|
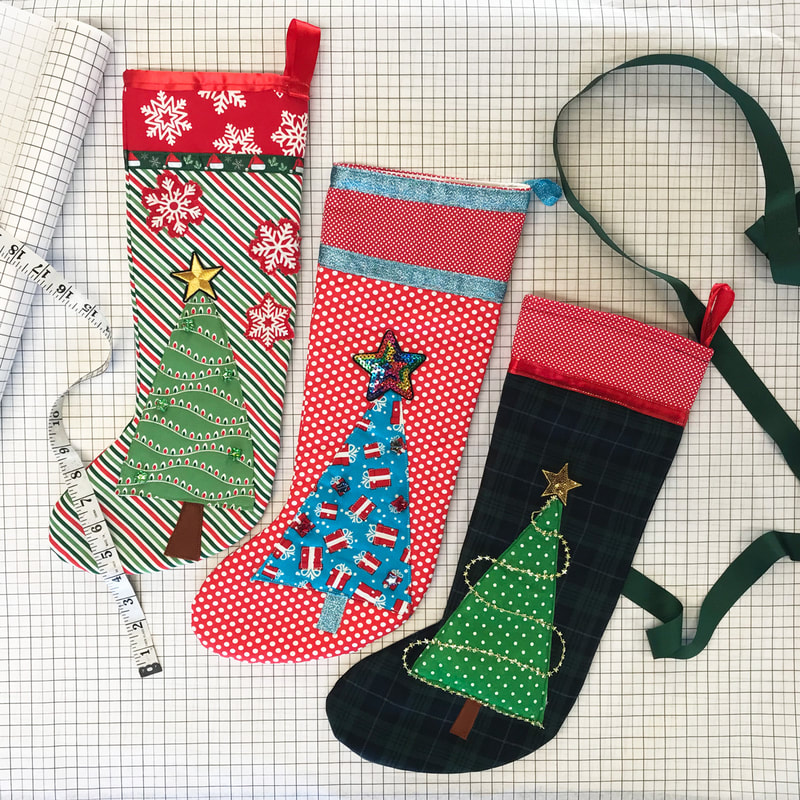
We love the tradition of hanging-up a Christmas stocking for Father Christmas to come and fill with pressies. As far as we're concerned it's an absolutely vital part of our homemade Christmas decorations. If you're looking to DIY a lovely Christmas stocking like these (or even one each for the whole family) then read on. Many of you will know we also run 'Learn to Sew a Christmas Stocking' sewing workshops in our craft studio upstairs at Tissington Craft Corner, Derbyshire. You will need • Sewing pattern in the shape of a stocking • 1 piece of Christmas cotton fabric (65cmx65cm) • Lightweight wadding/batting (65cmx65cm) • Plain cotton fabric for lining (65cmx65cm) • Embellishments such as any ribbons or glitzy decorative pieces for the front of the stocking. Many people like to personalise this part with the recipients initials. Method 1. Draw and cut-out a Christmas stocking / boot shape to act as your sewing pattern. Top tip: We find if you don't have gridded pattern-making paper, using a large sheet of newspaper works really well too. 2. Place the pattern on your Christmas fabric and draw around it. Flip the boot over so it's toe is pointing the other way and draw around again. Be careful not to make two pieces facing the same direction as the patterned side of your fabric needs to face outwards on both pieces when the stocking is finished. Cut out your fabric. 3. Cut out the same shapes from the wadding and lining fabrics. 4. Sew the wadding to the wrong side of the Christmas fabric, close to the edge on all sides. 5. Choose which side will be the front of your stocking and decorate/embellish as you'd like. 6. Put the two 'boots' right sides together and stitch around the boot leaving the top open. Turn it the right side out. 7. Stitch the cotton lining pieces together, leaving a large gap (approx 10cm) down the straight side for turning inside out later. 8. Put the stocking inside the lining with the wrong side of the lining facing out. 9. Machine sew the lining to the fabric around the top. 10. Pull the stocking out through the hole in the side of the lining. 11. Top stitch across the hole in the lining and push lining down inside the stocking. 12. Make a hanging loop with ribbon and sew to the top of the stocking. And MOST importantly... remember to leave it out for Santa. If you'd prefer to come and learn to make a DIY Christmas Stocking with us, we're running classes in December. They include tuition from the lovely Linda who will help beginners get set up on their sewing machines and teach you step-by-step to make your Christmas stockings. All the materials will be provided and you'll also get a copy of the sewing pattern to take home so you can continue making stockings at home! Click here to book
Good luck with your stockings, we'd love to see what you create. Tag us @tissingtoncraftcorner in any photos you post on Instagram and use the hashtag #eazicraftcreations Alternatively send any photos to us at [email protected]. We'd absolutely love to see them!
0 Comments
Leave a Reply. |
AuthorWe're a small team of creatives, each with our own area of expertise. Archives
April 2024
Categories |
Links
Support |
© COPYRIGHT 2022. ALL RIGHTS RESERVED.
|


 RSS Feed